Brief Summary
Most basic technique for tissue approximation, can be used for most wound-types.Technique Description
Loading Needle
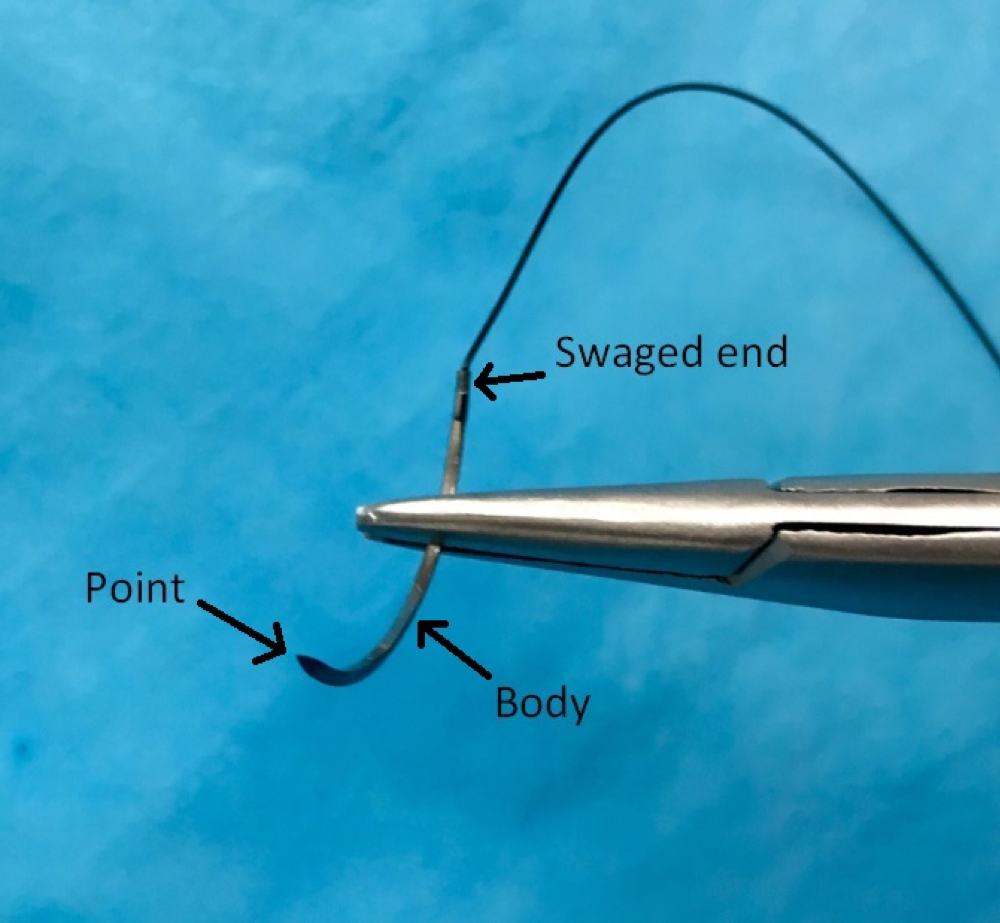
Load the needle on the needle driver 2/3 of the way from the point, towards the swaged end.
Skin Entry
- Always enter with the needle perpendicular to the wound.
- Paradoxically, as you enter the skin, angle down and slightly away from the margins of the laceration. An incorrect tendency is to aim in the direction of the wound margin, which ends up causing a shallow suture placement that can (undesirably) invert the wound edges.
Follow through
- The needle is your friend, simply follow its curvature through the underlying dermis.
- You will have created a “flask” shape which will ultimately create the eversion effect. Many incorrectly envision a circular shape for the suture, which will fail to evert the tissue.
- This is most important when there is a good amount of dermis below the wound, and may not apply for thinner areas of skin, such as the pretibial region.
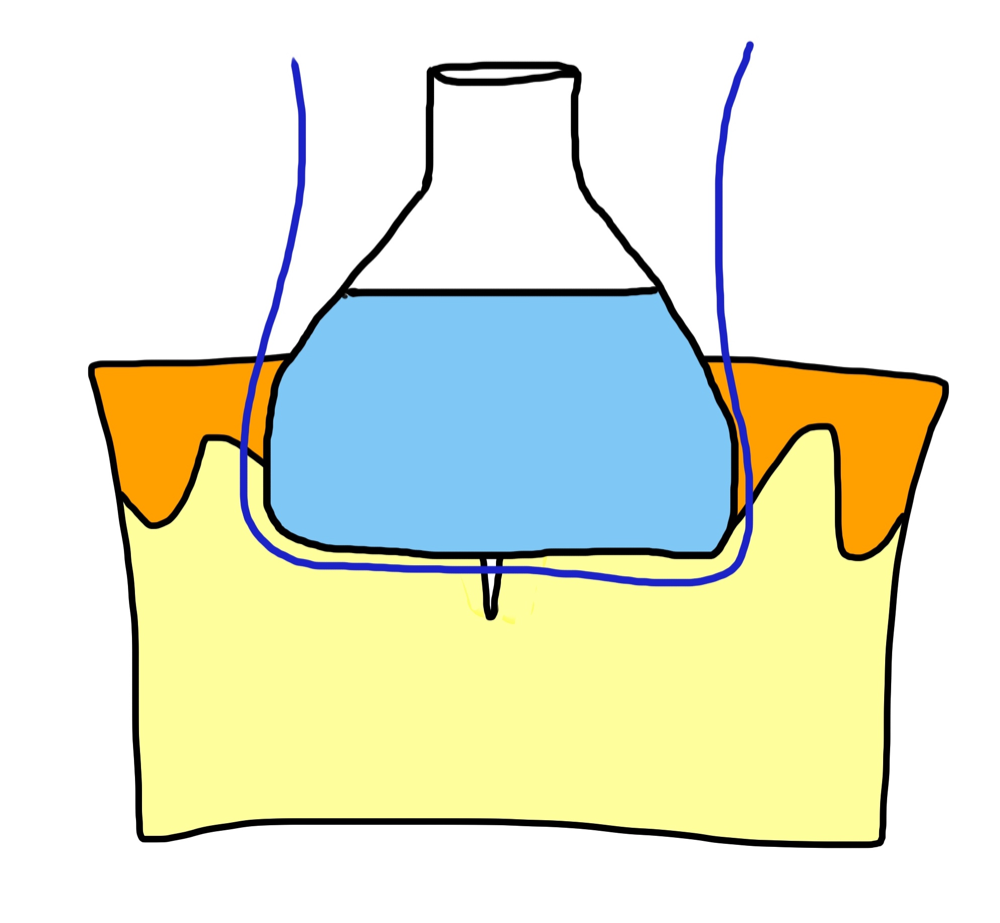
The “Flask” shape supporting wound edge eversion
The Finish
- Exit the skin with the needle perpendicular, similar to the entry.
- Exit equidistant on the far side of the wound, and attempt to angle the needle just slightly inwards to mirror the outwards angle on the entry side. This can be achieved by using a blunt instrument (such as closed forceps, or the flat side of suture scissors) to gently, slightly depress the tissue on the far margin outside of the wound as the needle exits the skin.
Knot Tying
- When performing an instrument tie, tie remotely from the wound with plenty of slack on the intervening suture thread. This prevents the “pulling up” effect which ultimately loosens the ties and leads to floating knots.
- Pull the knot to the side of the wound with better perfusion. This prevents the knot from granulating into the wound as it heals, which can lead to more trauma and tissue destruction during suture removal.